Sticker-Seeker Quest Machine

This piece of content contains information obtained through datamining.
Due to the nature of the information, details may be inaccurate or outdated.
This article is about the quest giver. For the tool, see Sticker-Seeker.
The Sticker Quest Giver and the Sticker-Seeker leaderboard.
The Sticker-Seeker Quest Machine is a quest giver in the Hive Hub. To interact with it, the player must own and have the Sticker-Seeker equipped. The player must also have a total of 15 bees hatched to interact with the machine.
Similar to Brown Bear, Polar Bear, Honey Bee, Gifted Riley Bee, and Gifted Bucko Bee, it can give infinite quests, with extra rewards at certain milestones, up to the 1000th quest.
Ranks
A player's rank is the amount of Sticker-Seeker Quest Machine's quests they have completed. Ranks are also the way the Top Sticker-Seekers leaderboard is measured, and increases every time a player completes a quest. The higher the rank, the better the rewards. For example, a player is more likely to get Sticker Planters when they have achieved further ranks than players with a Rank of 5. Quest requirement amounts also scale to the ranks.
Quests
Obtaining and turning in quests from this quest giver require the player to have the Sticker-Seeker equipped.
The only quest it can give is 🔎 Sticker-Seeker: Rank X, where X represents the quest's rank.
2 requirements will always show up in this quest, along with many other requirements:
- finding a number of Seeker Stickers hidden around the map,
- and collecting pollen with the Sticker-Seeker.
Seeker Stickers requirement
The game will always generate 2 more Seeker Stickers than is required to complete the quest, and Seeker Stickers that have not yet been found by the player will change their positions every 2 days.
The first 26 ranks' Seeker Sticker locations are predetermined, shown in the table below:
| Rank | Requirements |
|---|---|
| Rank 1 | Find 2 Seeker Stickers Hidden in the 5 Bee Zone. |
| Rank 2 | Find 2 Seeker Stickers Hidden in the 10 Bee Zone. |
| Rank 3 | Find 2 Seeker Stickers Hidden in the Starter Zone. |
| Rank 4 | Find 2 Seeker Stickers Hidden in the 20 Bee Zone or the 5 Bee Zone. |
| Rank 5 | Find 3 Seeker Stickers Hidden in the 10 Bee Zone or the Starter Zone. |
| Rank 6 | Find 3 Seeker Stickers Hidden in the 5 Bee Zone or the 10 Bee Zone. |
| Rank 7 | Find 3 Seeker Stickers Hidden in HQs. |
| Rank 8 | Find 3 Seeker Stickers Hidden in the 5 Bee Zone or the 20 Bee Zone. |
| Rank 9 | Find 3 Seeker Stickers Hidden in the Starter Zone or 10 Bee Zone. |
| Rank 10 | Find 3 Seeker Stickers Hidden in Zones that require 10 Bees or less. This includes:
|
| Rank 11 | Find 4 Seeker Stickers Hidden in the 25 Bee Zone. |
| Rank 12 | Find 4 Seeker Stickers Hidden in the 10 Bee Zone or the 15 Bee Zone. |
| Rank 13 | Find 4 Seeker Stickers Hidden in Shops. |
| Rank 14 | Find 4 Seeker Stickers Hidden in the 15 Bee Zone or the 20 Bee Zone. |
| Rank 15 | Find 4 Seeker Stickers Hidden in Zones that require 15 Bees or less. This includes:
|
| Rank 16 | Find 4 Seeker Stickers Hidden in the Starter Zone or the 25 Bee Zone. |
| Rank 17 | Find 4 Seeker Stickers Hidden in the 15 Bee Zone or HQs. |
| Rank 18 | Find 4 Seeker Stickers Hidden in the 5 Bee Zone, the 10 Bee Zone, or the 25 Bee Zone. |
| Rank 19 | Find 4 Seeker Stickers Hidden in the Starter Zone or the 20 Bee Zone. |
| Rank 20 | Find 4 Seeker Stickers Hidden in Zones that require up to 20 Bees. This includes:
|
| Rank 21 | Find 5 Seeker Stickers Hidden in the 25 Bee Zone or the 30 Bee Zone. |
| Rank 22 | Find 4 Seeker Stickers Hidden in Zones that require 15 Bees or less. This includes:
|
| Rank 23 | Find 4 Seeker Stickers Hidden in the 20 Bee Zone, the 25 Bee Zone, or HQs. |
| Rank 24 | Find 5 Seeker Stickers Hidden in the Starter Zone. |
| Rank 25 | Find 5 Seeker Stickers Hidden in the 5 Bee Zone or the 10 Bee Zone. |
| Rank 26 | Find 5 Seeker Stickers Hidden in Zones that require up to 30 Bees. This includes:
|
Past the 26th quests, the requirement is randomly generated.
|
Pollen requirement
The amount of pollen required is equal to \(P(X)=100000+99900000\times {Q(X)}^{2.25}+25000\times (X-1)+\Delta (X)\), floored to the nearest \(S(P(X))\) .
- X represents the quest's rank, or the player's rank plus 1.
- \(Q(X)\) is equal to \({\frac {X-1}{499}}\), clamped between 0 and 1.
- \(\Delta(X)\) is equal to:
- 0 if \(X\leq 500\)
- \(1000000\times (X-500)\) otherwise
- \(S(P(X))\) is equal to:
- 50000 if \(P(X)\geq 1,000,000\)
- 25000 if \(500,000\leq P(X)<1,000,000\)
- 10000 if \(100,000\leq P(X)<500,000\)
- 5000 if \(25,000\leq P(X)<100,000\)
- 1000 if \(P(X)<25,000\)
Other requirements
The remaining requirements are randomly picked from a pool. The number of extra requirements given starts at 1, increases to 2 at quest 100, and finally to 3 at quest 250. The same requirement cannot appear 2 quest ranks in a row.
The requirements are chosen using the following steps:
- All possible requirements are added to a pool, if they:
- have not appeared in the last quest,
- and the player has reached the minimum rank requirement for it to appear.
- Each requirement is then given a weight, and the game picks out one requirement using said weights. The probability of a quest being picked is equal to its weight divided by the sum of all requirements' weights in the pool.
- After a requirement is picked, it is removed from the pool, and another one is picked until it has reached its limit of requirements.
Below is a list of all possible requirements, along with its minimum rank requirement and its weight. For requirements with two given values, use the first value for any rank between 1 and 149, and the second value for any rank from 150 onwards.
| Requirement | Minimum rank requirement | Weight |
|---|---|---|
| Collect 6 or 20 Stickers (without Trading). | 0 | 7 |
| Donate 1 or 7 Stickers to the Public Sticker Board. | 0 | 10 |
| Collect 3 or 12 Sticker Tokens. | 0 | 6 |
| Collect 1 or 3 Stickers from Sprouts. | 8 | 3 |
| Find 7 or 8 Hidden Stickers on Surfaces around the Map. | 10 | 8 |
| Collect 1 or 5 Stickers spawned by your Tool while Gathering. | 10 | 6 |
| Collect a Sticker from Leaves. | 15 | 6 |
| Collect 1 or 3 Stickers found by your Bees while Gathering. | 20 | 5 |
| Print 1 or 3 Stickers with the Sticker Printer. | 25 | 7 |
| Collect 1 or 2 Stickers from Puffshrooms. | 30 | 4 |
| Collect a Sticker from Wild Windy Bee. | 35 | 4 |
| Discard 5 or 25 Stickers. | 40 | 10 |
| Collect 1 or 3 Stickers from Planters. | 45 | 3 |
| Collect a Sticker from Fireflies. | 50 | 4 |
| Collect a Sticker from the Public Sticker Board. | 100 | 4 |
On every 10th quest, there is also an extra requirement:
|
Rewards
Every quest reward always includes (assuming X is the quest's rank, clamped between 1 and 100000):
- \(\left\lfloor {\frac {P(X)\times 2}{50000}}\right\rfloor \times 50000\) Honey, where \(P(X)\) is the amount of pollen the player collected to finish the quest
- \(\min(1+\left\lfloor {\frac {X}{100}}\right\rfloor ,5)\) Tickets
- \(\max(\left\lfloor {\frac {X}{4}}\right\rfloor ,1)\) Royal Jellies
- One of:
- 1 Soft Wax
- 1 Neonberry
- 1 Micro-Converter
- 1 Field Dice
- 3 Whirligigs
- A random Sticker
There are also multiple quest milestones, which gives extra rewards like certain Stickers, Eggs and Sticker Planters for completing them.
If a Sticker Planter is not guaranteed from reaching a quest milestone, the player also has a 2 to 5% chance to receive a Sticker Planter from the quest. The chance increases quadratically from rank 1 to 500, where it maxes out at 5%. More specifically, the formula for determining the probability of a quest giving the player a Sticker Planter is \(2\%+3\%\times {({\frac {X-1}{499}})}^{2}\), where X is the quest's rank.
Sticker reward
The sticker reward is chosen based on the following process:
- Every attainable sticker is added to a pool. Then, stickers are removed from the pool if:
- the player has not satisfied the sticker's minimum quest rank requirement,
- the sticker is guaranteed because the player has reached a milestone,
- or the sticker cannot be obtained because of the player's spread ID.
- Every sticker remaining in the pool is given a range of weight values. The weight values are given below:
Note: If multiple stickers are listed, only 1 of them can be attained at a time based on the player's spread ID.
Show/hide table
| Sticker | Minimum quest requirement | Weight lower bound | Weight upper bound |
|---|---|---|---|
| Yellow Umbrella | 0 | 1 | 0.25 |
| Green Check Mark | 0 | 0.6 | 0.3 |
| Green Plus Sign | 0 | 0.6 | 0.3 |
| Yellow Left Arrow OR Yellow Right Arrow |
0 | 1.5 | 1 |
| Thumbs Up Hand OR Peace Sign Hand |
5 | 1.5 | 1 |
| Simple Cloud | 10 | 1 | 0.5 |
| Tough Potato | 10 | 0.4 | |
| Standing Bean Bug | 10 | 0.02 | |
| Coiled Snake | 15 | 0.2 | |
| Pink Chair | 15 | 0.1 | |
| Nessie | 18 | 0.001 | |
| Lightning | 20 | 1 | 0.5 |
| Grey Diamond Logo | 20 | 0.2 | |
| Basic Red Hive Skin | 20 | 0.03 | |
| Basic Blue Hive Skin | 20 | 0.03 | |
| Blue And Green Marble OR Orange Swirled Marble OR Yellow Swirled Marble |
25 | 0.1 | 0.2 |
| Doodle S | 30 | 0.4 | |
| 4-Pronged Vector Bee | 30 | 0.02 | |
| Taunting Doodle Person | 35 | 0.02 | |
| Orange Step Array OR Orange Green Tri Deco |
40 | 0.1 | 0.2 |
| Squashed Head Bear | 40 | 0.02 | |
| Stretched Head Bear | 40 | 0.02 | |
| Shining Halo | 50 | 0.1 | |
| Wall Crack | 50 | 0.02 | |
| Auryn | 50 | 0.005 | |
| Black Star | 70 | 0.02 | |
| Prism Painting OR Banana Painting |
75 | 0.1 | |
| Prehistoric Hand OR Prehistoric Boar |
80 | 0.02 | |
| Basic Pink Hive Skin | 80 | 0.015 | |
| Basic Green Hive Skin | 80 | 0.015 | |
| Abstract Color Painting | 90 | 0.02 | |
| Ionic Column Middle | 100 | 0.3 | |
| Ionic Column Top OR Ionic Column Base |
100 | 0.2 | |
| Dapper From Above | 100 | 0.005 | |
| Pearl Girl | 150 | 0.02 | |
| Royal Bear | 160 | 0.02 | |
| Basic White Hive Skin | 200 | 0.007 | |
| Basic Black Hive Skin | 200 | 0.007 | |
- To calculate a sticker's true weight, the following formula is used: \(weight=leftBound+(rightBound-leftBound)\times \min({\frac {X-1}{499}},1)\), where X is the quest's rank.
- The probability of getting a sticker can now be found by dividing the sticker's true weight by the sum of the true weight of every sticker in the pool.
Below is a table containing the probability of getting a certain sticker at some quest milestones, ignoring guaranteed sticker milestones. For a more detailed table, see the linked subarticle.
Show/hide table
| Sticker | ||||||
|---|---|---|---|---|---|---|
| Rank 0 | Rank 100 | Rank 200 | Rank 300 | Rank 400 | Rank 500 | |
| Yellow Umbrella | 10.28% | 9.34% | 8.27% | 7.016% | 5.55% | 3.8% |
| Green Check Mark | 6.17% | 5.93% | 5.67% | 5.36% | 4.99% | 4.56% |
| Green Plus Sign | 6.17% | 5.93% | 5.67% | 5.36% | 4.99% | 4.56% |
| Yellow Left Arrow OR Yellow Right Arrow |
15.41% | 15.38% | 15.34% | 15.3% | 15.25% | 15.19% |
| Thumbs Up Hand OR Peace Sign Hand |
- | 15.38% | 15.34% | 15.3% | 15.25% | 15.19% |
| Simple Cloud | - | 9.89% | 9.44% | 8.93% | 8.32% | 7.59% |
| Tough Potato | - | 4.39% | 4.72% | 5.097% | 5.54% | 6.074% |
| Standing Bean Bug | - | 0.22% | 0.24% | 0.25% | 0.28% | 0.3% |
| Coiled Snake | - | 2.2% | 2.36% | 2.55% | 2.77% | 3.037% |
| Pink Chair | - | 1.098% | 1.18% | 1.27% | 1.39% | 1.52% |
| Nessie | - | 0.011% | 0.012% | 0.013% | 0.014% | 0.015% |
| Lightning | - | 9.89% | 9.44% | 8.93% | 8.32% | 7.59% |
| Grey Diamond Logo | - | 2.2% | 2.36% | 2.55% | 2.77% | 3.037% |
| Basic Red Hive Skin | - | 0.33% | 0.35% | 0.38% | 0.42% | 0.46% |
| Basic Blue Hive Skin | - | 0.33% | 0.35% | 0.38% | 0.42% | 0.46% |
| Blue And Green Marble OR Orange Swirled Marble OR Yellow Swirled Marble |
- | 1.32% | 1.65% | 2.038% | 2.49% | 3.037% |
| Doodle S | - | 4.39% | 4.72% | 5.097% | 5.54% | 6.074% |
| 4-Pronged Vector Bee | - | 0.22% | 0.24% | 0.25% | 0.28% | 0.3% |
| Taunting Doodle Person | - | 0.22% | 0.24% | 0.25% | 0.28% | 0.3% |
| Orange Step Array OR Orange Green Tri Deco |
- | 1.32% | 1.65% | 2.038% | 2.49% | 3.037% |
| Squashed Head Bear | - | 0.22% | 0.24% | 0.25% | 0.28% | 0.3% |
| Stretched Head Bear | - | 0.22% | 0.24% | 0.25% | 0.28% | 0.3% |
| Shining Halo | - | 1.098% | 1.18% | 1.27% | 1.39% | 1.52% |
| Wall Crack | - | 0.22% | 0.24% | 0.25% | 0.28% | 0.3% |
| Auryn | - | 0.055% | 0.059% | 0.064% | 0.069% | 0.076% |
| Black Star | - | 0.22% | 0.24% | 0.25% | 0.28% | 0.3% |
| Prism Painting OR Banana Painting |
- | 1.098% | 1.18% | 1.27% | 1.39% | 1.52% |
| Prehistoric Hand OR Prehistoric Boar |
- | 0.22% | 0.24% | 0.25% | 0.28% | 0.3% |
| Basic Pink Hive Skin | - | 0.16% | 0.18% | 0.19% | 0.21% | 0.23% |
| Basic Green Hive Skin | - | 0.16% | 0.18% | 0.19% | 0.21% | 0.23% |
| Abstract Color Painting | - | 0.22% | 0.24% | 0.25% | 0.28% | 0.3% |
| Ionic Column Middle | - | 3.29% | 3.54% | 3.82% | 4.16% | 4.56% |
| Ionic Column Top OR Ionic Column Base |
- | 2.2% | 2.36% | 2.55% | 2.77% | 3.037% |
| Dapper From Above | - | 0.055% | 0.059% | 0.064% | 0.069% | 0.076% |
| Pearl Girl | - | - | 0.24% | 0.25% | 0.28% | 0.3% |
| Royal Bear | - | - | 0.24% | 0.25% | 0.28% | 0.3% |
| Basic White Hive Skin | - | - | 0.083% | 0.089% | 0.097% | 0.11% |
| Basic Black Hive Skin | - | - | 0.083% | 0.089% | 0.097% | 0.11% |
Milestones
All known quest milestones are shown in the tables below.
Note: It is currently impossible to progress past Rank 589 because there are only 291 different stickers in-game and Rank 590 requires 295 stickers stacked, making it impossible to complete.
Item Milestones
| Rank | Reward |
|---|---|
| 10 |  Pink Balloon Pink Balloon
|
| 25 |  Silver Egg Silver Egg
|
| 50 |  Gold Egg Gold Egg
|
| 75 |  Diamond Egg Diamond Egg
|
| 100 |  Gifted Silver Egg Gifted Silver Egg
|
| 110 |  Red Balloon Red Balloon
|
| 150 |  Gifted Gold Egg Gifted Gold Egg
|
| 200 |  Gifted Diamond Egg Gifted Diamond Egg
|
| 210 |  White Balloon White Balloon
|
| 300 |  Mythic Egg Mythic Egg
|
| 310 |  Black Balloon Black Balloon
|
| 400 |  Star Egg Star Egg
|
| 410 | 3 Pink Balloons
|
| 500 |  Gifted Mythic Egg Gifted Mythic Egg
|
| 510 | 3 White Balloons
|
| 600 | 3 Gifted Silver Eggs
|
| 610 | 3 White Balloons
|
| 700 | 3 Gifted Gold Eggs
|
| 800 | 3 Gifted Diamond Eggs
|
| 900 | 3 Mythic Eggs
|
| 1000 | 3 Gifted Mythic Eggs
|
Sticker Planter Milestones
| Rank | Amount |
|---|---|
| 11 |  1 Sticker Planter 1 Sticker Planter
|
| 33 | 1 Sticker Planter
|
| 55 | 1 Sticker Planter
|
| 77 | 1 Sticker Planter
|
| 99 | 1 Sticker Planter
|
| 111 | 1 Sticker Planter
|
| 133 | 1 Sticker Planter
|
| 144 | 1 Sticker Planter
|
| 155 | 1 Sticker Planter
|
| 166 | 1 Sticker Planter
|
| 199 | 1 Sticker Planter
|
| 222 | 2 Sticker Planters
|
| 244 | 1 Sticker Planter
|
| 255 | 1 Sticker Planter
|
| 266 | 1 Sticker Planter
|
| 277 | 1 Sticker Planter
|
| 333 | 3 Sticker Planters
|
| 411 | 1 Sticker Planter
|
| 422 | 2 Sticker Planters
|
| 444 | 4 Sticker Planters
|
| 555 | 5 Sticker Planters
|
Sticker Milestones
The game chooses which sticker to give the player based on their spread ID. For more information, visit the linked section.
| Rank | Reward |
|---|---|
| 20 | 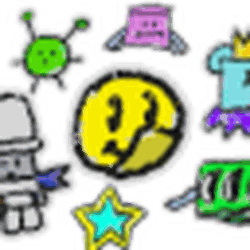 Doodle S Sticker OR Tough Potato Sticker Doodle S Sticker OR Tough Potato Sticker
|
| 40 | Orange Swirled Marble Sticker, Yellow Swirled Marble Sticker OR Blue And Green Marble Sticker |
| 60 | Coiled Snake Sticker OR Grey Diamond Logo Sticker |
| 90 | Orange Step Array Sticker OR Orange Green Tri Deco Sticker |
| 120 | Ionic Column Top Sticker OR Ionic Column Base Sticker |
| 140 | Prism Painting Sticker OR Banana Painting Sticker |
| 180 | Prehistoric Hand Sticker OR Prehistoric Boar Sticker |
| 220 | Ionic Column Middle Sticker |
| 250 | 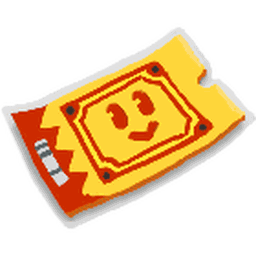 1 Ticket Voucher 1 Ticket Voucher
|
| 350 | 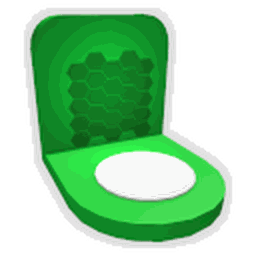 Basic Green Hive Skin OR Basic Green Hive Skin OR 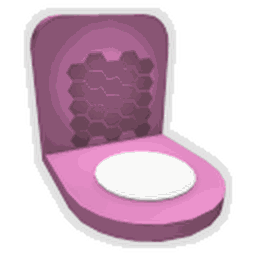 Basic Pink Hive Skin Basic Pink Hive Skin
|
| 450 |  Basic White Hive Skin OR Basic White Hive Skin OR  Basic Black Hive Skin Basic Black Hive Skin
|
Trivia
- It is the only Quest Giver that does not have any dialogue and does not notify to talk to the Machine again after quest completion.
- The Sticker Quest Giver is the fourth randomized Quest Giver to give eggs at certain milestones, the other three being Gifted Riley Bee, Gifted Bucko Bee, and Brown Bear.
- The quests it gives always includes the requirements "Collect {amount} of Pollen using Sticker-Seeker," and "Find 2-7 Seeker-Stickers hidden in {zones}."
- Sometimes, a quest requirement can get so long you can’t see part of it.
- Progressing in the requirement a bit may fix this problem.
- When having the Sticker-Seeker equipped and standing on the pad with the machine in front of it, normally there is a message saying
Your Sticker-Seeker quest is in progress… (if you have not yet completed the quest). However, after standing on the pad for a few seconds, it changes to the next egg reward, and at what rank you will obtain it.
- The Sticker-Seeker Quest Machine has 8 Stickers on it.
- The difficulty of the quests it gives is supposed to scale linearly with the player's rank, up to rank 150. However, due to an oversight, the difficulty instead stays the same until rank 150, where it takes a massive leap.