Dapper Bear's Shop
Dapper Bear's Shop is a shop located behind the Brave Bee Gate. Located on a hilltop, the player is able to access the shop by jumping between ledges to climb the hill. The shop sells reusable Planters and 6 beequips, with the 3rd, 4th, 5th, and 6th beequips requiring you to complete a certain number of Dapper Bear's quests in order to unlock them. You also have to pay honey and tickets for each beequip with the amounts scaling from the quality of the beequip. This is also where Dapper Bear is located.
To enter Dapper Bear's Shop, the player must be equipped with the Propeller Hat and the Hiking Boots, or any hat and boots of higher quality. If the player approaches wearing gear of a lower tier (such as the Helmet, Strange Goggles, or Basic Boots), a red barrier will block entry and display the message: You Must Wear a Nice Hat and Cool Boots to enter Dapper Bear's Shop.
The shop has a tan interior with a blue floor and ceiling, as well as two windows in the front. Above the entrance is an image of a Beequip Case. On the left side of the interior, there is the Beequip shop and the Highest Damage to a Single Puffshroom leaderboard. On the right side of the shop is the Planter shop. The roof of the shop has a Royal Jelly token, 25 Honeysuckles, 3 Smooth Dice and a Bloom Shaker.
The shop has an obstacle course on the right side of the shop that leads up to the roof. It splits up into two paths: a rocky wall and a moon obby. The rocky wall allows access the roof, where a royal jelly and a honeysuckle token are hidden. The moon obby leads to a Star Jelly on a platform behind the shop. It is also possible to bypass the obby by using a Glider.
As of the time of writing, during every Beesmas since 2021, Dapper Bear's Samovar is located next to the shop entrance. In many Beesmas events since, Gift Boxes were also placed on the roof, or near the shop in some capacity.
Planter Shop
| Item | Cost | Description |
|---|---|---|
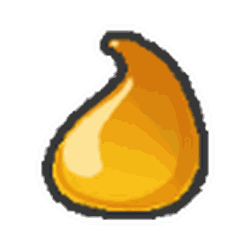 750,000 Honey 750,000 Honey
|
A reusable planter that grows in about 2 hours. Stores around 250k Pollen. Harvest to collect random items and Nectar boosts! | |
| 5,000,000 Honey
|
Alone, grows in about 4 hours and stores around 1 million Pollen. Grants bonus 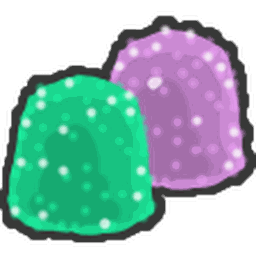 Gumdrops and Jellybeans. Gumdrops and Jellybeans.
Pineapple Patch, and Coconut Field.
| |
| 50,000,000 Honey
|
Alone, grows in about 8 hours and stores around 15 million Pollen. Grants bonus Field Dice and Sunflower Seeds.
| |
| 750,000,000 Honey
|
Alone, grows in about 10 hours and stores around 200m Pollen. Grants bonus Bitterberries and Neonberries.
| |
| 100T Honey
|
Alone, grows in about 16 hours and stores around 1 trillion Pollen. Grants many bonus items, including Neonberries, Waxes, and Turpentine.
|
 3
3  1
1  3
3  1
1  5
5  25
25  15
15  3
3  100
100  100
100  25
25 Beequip Shop
Some content in this page is missing.
This content in this page was documented late. You can help the Re://:Swarm Wiki by proofreading the information or adding missing pieces of information.
Missing content: Information about the Beequip Shop is sourced from anecdotes. Because of this, some information may be wrong or missing. If you have any proof of this, please message an active staff member with the proof. General data may also be sent via the linked thread.
This content contains assumptions.
Though the precise details may be inaccurate, most information comes from great testing and supported assumptions.
Assumptions made: The ranges of prices are inferred based on assumptions about the formula, and as such may be wrong.
Much of the information provided came from the Dapper Bear's Beequip Shop Data spreadsheet. Information without proof has been stripped.
The Beequip Shop offers Beequips, sold in 6 slots. Only the first 2 are unlocked for the player at first; the 3rd, 4th, 5th, and 6th slots respectively require 5, 10, 15, and 20 quests finished from Dapper Bear. Higher slots can give better beequips, with better chances for a high potential. The cost of a given beequip scales based on the type of the beequip and its potential.
Beequips displayed in the shop can show half-star potential values, unlike when inspecting from the Beequip Case. Note that despite what inspecting the beequip after buying it shows, the potential of the bought beequip is unchanged.
Each slot is refreshed with a new beequip after a certain amount of time. More specifically, starting from 0 AM (UTC):
- Slot 1 refreshes every 2 hours.
- Slot 2 and 3 refrehses every 4 hours.
- Slot 4 and 5 refreshes every 8 hours.
- Slot 6 refreshes every 24 hours.
Below is a table of every beequip that can appear in the shop, along with some general information.
Show/hide table
| Beequip | Minimum Cost | Maximum Cost | Slots Available |
|---|---|---|---|
| 10B Honey
|
10T Honey
|
3, 4, 5, 6 | |
| 250K Honey
|
20M Honey
|
1, 2, 3, 4 | |
| 100M Honey Unknown Tickets |
100B Honey
|
5, 6 | |
| 50M Honey
|
50B Honey
|
5, 6 | |
| 100M Honey Unknown Tickets |
100B Honey
|
5, 6 | |
| 2.5M Honey
|
2.5B Honey
|
1, 2, 3, 4 | |
| 10M Honey
|
10B Honey
|
3, 4, 5, 6 | |
| 400M Honey
|
400B Honey
|
3, 4, 5, 6 | |
| 1B Honey
|
1T Honey
|
3, 4, 5, 6 | |
| 500M Honey
|
500B Honey
|
5, 6 | |
| 1B Honey
|
1T Honey
|
4, 5, 6 | |
| 100M Honey
|
100B Honey
|
5, 6 | |
| 20M Honey
|
20B Honey
|
1, 2, 3, 4, 5 | |
| 250M Honey
|
250B Honey
|
3, 4, 5, 6 | |
| 500M Honey
|
500B Honey
|
3, 4, 5, 6 | |
| 10M Honey
|
15B Honey
|
2, 3, 4, 5, 6 | |
| 1M Honey
|
1B Honey
|
2, 3, 4, 5 | |
| 250K Honey
|
20M Honey
|
1, 2, 3, 4 | |
| 10M Honey
|
10B Honey
|
2, 3, 4, 5 | |
| 100M Honey
|
100B Honey
|
4, 5, 6 |
 75
75 The table below goes into detail on the range of potential of the beequips in each slot.
Show/hide table
| Beequip | Slot 1 | Slot 2 | Slot 3 | Slot 4 | Slot 5 | Slot 6 |
|---|---|---|---|---|---|---|
| N/A | N/A | 0-2 stars | 0-3 stars | 2-4 stars | 2-5 stars | |
| 0-2 stars | 2-4 stars | 3-5 stars | 4-5 stars | N/A | N/A | |
| N/A | N/A | N/A | N/A | Unknown | 2-5 stars | |
| N/A | N/A | N/A | N/A | 0-3 stars | 2-5 stars | |
| N/A | N/A | N/A | N/A | 2-4 stars | 3-5 stars | |
| 0-1 stars | 1-3 stars | 3-4 stars | 4-5 stars | N/A | N/A | |
| N/A | N/A | 0-2 stars | 0-2 stars | 2-4 stars | 4-5 stars | |
| N/A | N/A | 0-2 stars | 0-3 stars | 2-4 stars | 3-5 stars | |
| N/A | N/A | 0-2 stars | 0-3 stars | 2-4 stars | 2-5 stars | |
| N/A | N/A | N/A | N/A | 0-2 stars | 2-5 stars | |
| N/A | N/A | N/A | 0-2 stars | 0-5 stars | 2-5 stars | |
| N/A | N/A | N/A | N/A | 0-2 stars | 2-5 stars | |
| 0-1 stars | 0-2 stars | 1-4 stars | 3-4 stars | 4-5 stars | N/A | |
| N/A | N/A | 0-2 stars | 1-3 stars | 2-4 stars | 3-5 stars | |
| N/A | N/A | 0-2 stars | 0-3 stars | 2-4 stars | 3-5 stars | |
| N/A | 0-1 stars | 0-2 stars | 2-4 stars | 3-5 stars | 4-5 stars | |
| N/A | 0-2 stars | 2-4 stars | 3-4 stars | 4-5 stars | N/A | |
| 0-2 stars | 2-4 stars | 3-5 stars | 4-5 stars | N/A | N/A | |
| N/A | 0-2 stars | 2-4 stars | 3-4 stars | 4-5 stars | N/A | |
| N/A | N/A | N/A | 0-2 stars | 1-3 stars | 3-5 stars |
Music
The following music 'nectar' plays in his shop:
Trivia
- This shop and Robo Bear's Shop are the only shops where the Bear NPC owner can talk to you. If you have bought Gummy Boots, Mask or Gummyballer, You can talk to Gummy Bear.
- This is the only shop where you need to equip a certain hat and boots to access (Propeller Hat and Hiking Boots or something "higher" than them).
- This shop, Robo Bear's Shop, Ticket Tent and the Coconut Cave are the only shops where the music that is playing isn't "vendor".
- Unlike the other two, Dapper Bear's Shop has its own music.
- Using the Hiking Boots can help with completing the obby. The jump power is low enough to not bump into the roof, but high enough to be able to grab the Star Jelly at the end. A Glider is also recommended.
- There used to be a Beequip Storage case to Dapper Bear's left, but it was moved to the spawn.